Adobe Illustrator is a good graphic design program to make use of whenever you need to create editable vector graphics. A vector graphic may be scaled up with out dropping any element, so you may make an illustration, together with typography, that may look nearly as good on a billboard as a enterprise card.
Think about making a spherical badge or brand, and also you need to kind textual content round a round path. You may want the textual content on the backside of the circle to flip to the alternative aspect of the trail, so it’s simply legible. On this Illustrator tutorial, we’ll educate you learn how to flip textual content on a path in Illustrator, so the textual content isn’t the wrong way up.

The best way to Flip Sort on a Path in Illustrator
Whether or not utilizing Adobe Illustrator CC or an earlier model of Illustrator, a path is solely one (or extra!) straight or curved traces. A path may be open or closed, relying on whether or not the endpoints are joined collectively.
We’ll begin with a easy circle design. We’ll create a round path, after which we’ll use the sort device to kind textual content alongside that path. Lastly, we’ll flip a few of the textual content, so it seems proper aspect up alongside the underside of the circle.
- Choose the Ellipse device.

- Maintain down the Shift key and draw a circle on the canvas. Holding the Shift key will drive the ellipse you create into an ideal circle. Any stroke or fill shade will disappear when you add textual content.

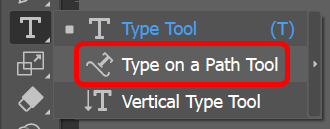
- Within the Sort Device flyout menu, select the Sort on a Path Device.
- Within the Window menu, choose Sort > Paragraph > Heart to heart the textual content you’re about to kind. The Home windows shortcut for the Paragraph panel is Ctrl + Alt + T. Mac customers can use Possibility + Command + T.

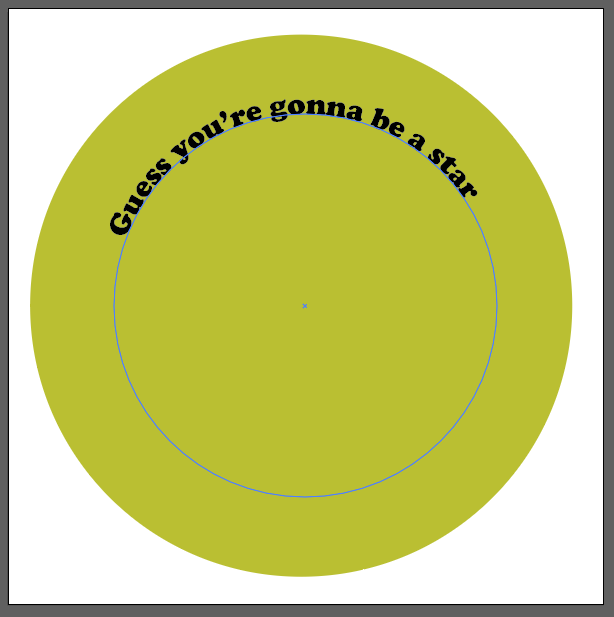
- With the Sort on a Path device nonetheless chosen, click on the highest of the circle you created in step 2. Illustrator will add lorem ipsum textual content parallel to the baseline path of the circle.
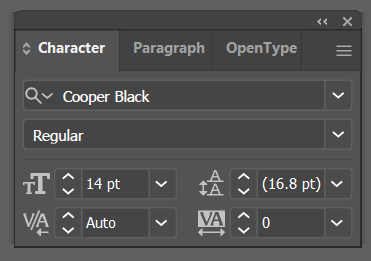
- Choose the font and character measurement within the Character tab on the Sort panel or show the character panel by choosing Home windows > Sort > Character.
- Enter the textual content you need on the prime of the circle.
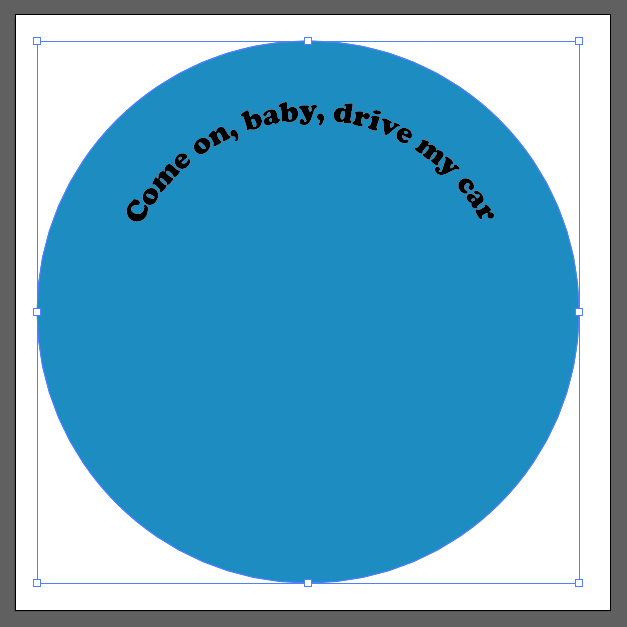
- You’ll see three handles (additionally referred to as alignment brackets) close to the textual content: one to the left, one within the center, and one on the best. Use these handles to rotate the textual content across the circle till it’s proper the place you need it.

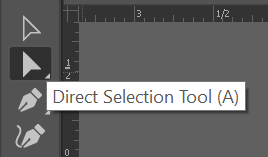
- Subsequent, we’ll copy what we have now to date and duplicate it. Utilizing the Direct Choice device on the toolbar, choose the circle after which select Edit > Copy or use the keyboard shortcut Ctrl + C.
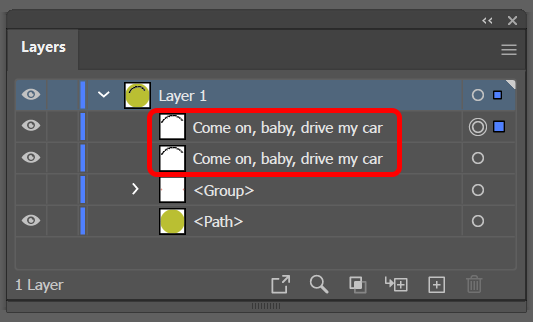
- Subsequent, paste what we copied in entrance of what’s already on the artboard. Do this by choosing Edit > Paste in Entrance. Relying on what font you used, you would possibly discover that the textual content seems to be barely darker since there are actually two stacked copies of it on the textual content path. A better strategy to verify that you've got two copies of the textual content is to look within the Layers panel. You need to see two entries in your textual content. If you need, you may rename one to point it’s the copy in entrance.
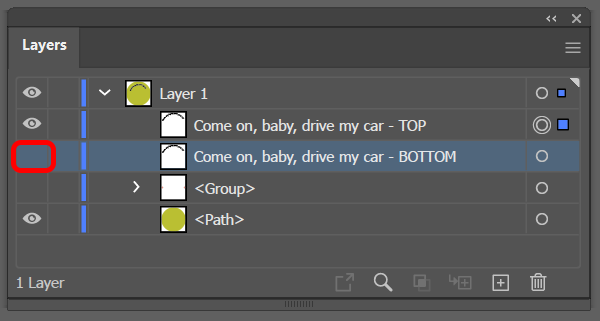
- Within the Layers panel, flip off the visibility of the underside layer.
- Choose the Sort Device, choose the textual content on the trail, and kind the brand new textual content—the textual content you’ll transfer to the underside of the circle path.
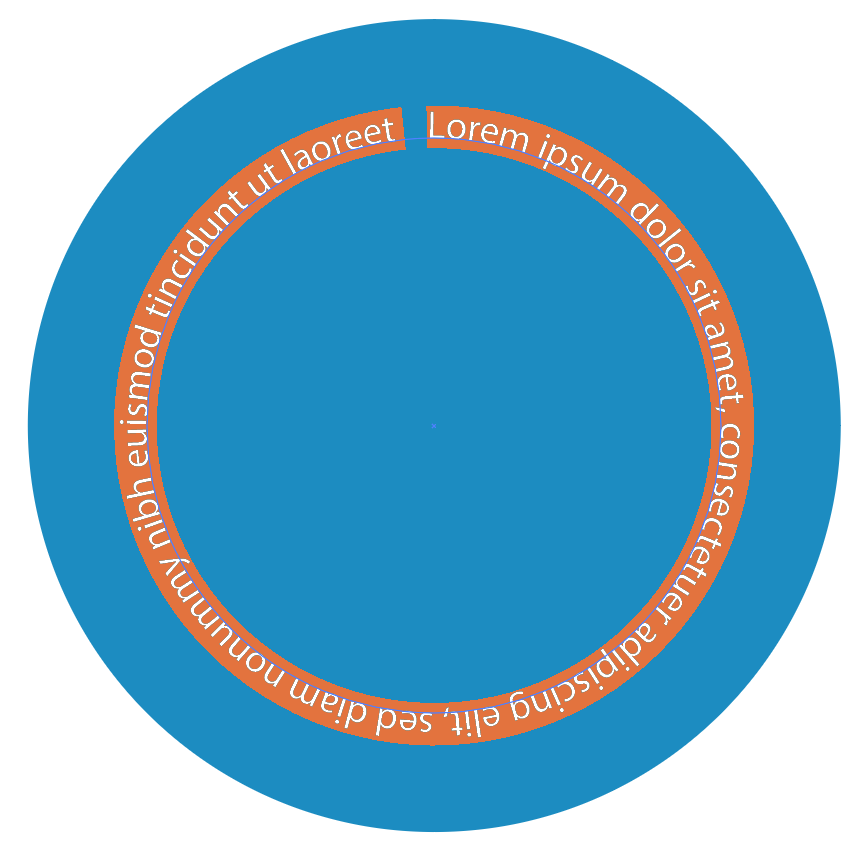
- Now comes the enjoyable half. Open the Path Choices dialog field by choosing Sort > Sort on a Path > Sort on a Path Choices. For the textual content impact, select Rainbow, and within the Align to Path dropdown, choose Ascender. Additionally, examine the Flip field, and choose the OK button. (Test the Preview field to get a sophisticated look.)
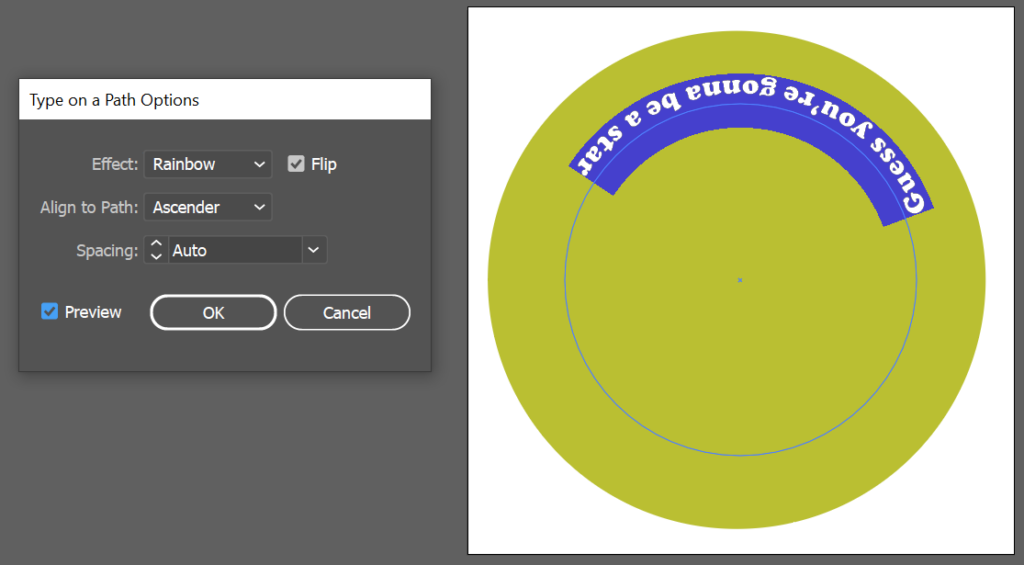
Word: For the Align to Path choices, selecting Baseline will put the textual content proper on the trail. Ascender places the textual content on the surface of the circle. Descender will find the textual content on the within of the circle. Lastly, Heart will place the textual content proper on the heart of the trail.
- Click on wherever exterior the textual content to deselect it, and, as soon as once more, use the handles to regulate the spacing and transfer the textual content alongside the trail to the underside of the circle.
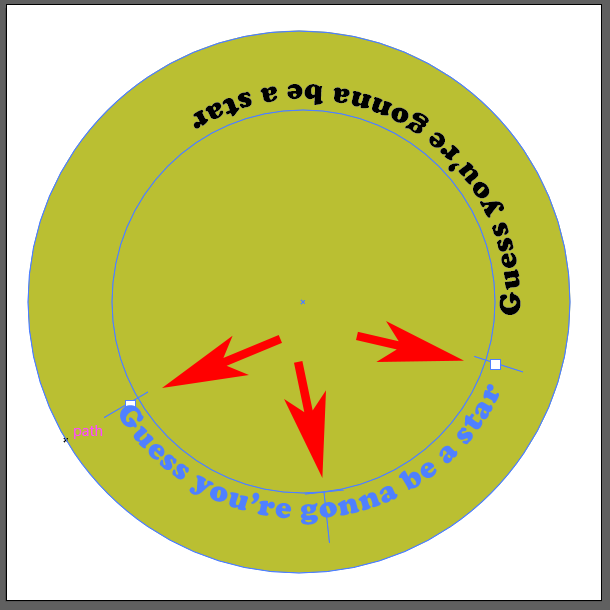
- Subsequent, flip the visibility of the highest layer of textual content again on.

That’s the way you add and flip textual content on a path in Adobe Illustrator.

Insert a Image in Your Design
A straightforward manner so as to add an additional component or two to a design in Adobe Illustrator is to insert one thing from the Symbols panel. Comply with the steps beneath so as to add a image to your design.
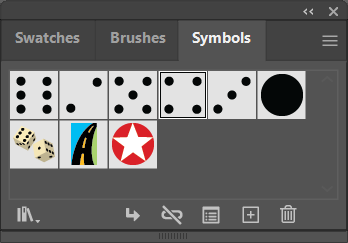
- View the Symbols panel by choosing Window > Symbols.
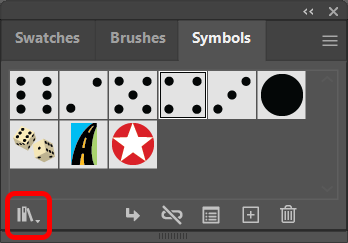
- Use the Symbols Library dropdown arrow to view a listing of all of the libraries put in in your laptop. Choose considered one of them to launch a panel the place you should use navigation arrows to web page by every Symbols library.
- While you discover a image you need to use, drag and drop it into your design.
- Use the Choice Device to resize the image to suit your design.

Adobe apps have all types of hidden options like Symbols you could solely benefit from if they’re there. We’ve received tutorials on learn how to obtain many results in Adobe Photoshop, like learn how to add a border to photographs, shapes, and textual content or use masks to cover layers, and even learn how to do a face swap.
And if you happen to’re starting to make use of Adobe Indesign, you’ll need to take a look at our tutorials on learn how to hyperlink textual content packing containers or movement textual content round a picture.
Post a Comment